Maryport is a historic coastal town and former coal port in Cumbria, this small harbour boasts 2000 years of history, located on the Solway Firth where the River Ellen meets the sea, it offers scenic views of the Scottish coast.
The town is famous for its Roman heritage, Georgian architecture, and working harbour, when the Romans came to what is now Maryport they named it Alauna and used the harbour for supplying the large fort above the town, the outline of which remains.
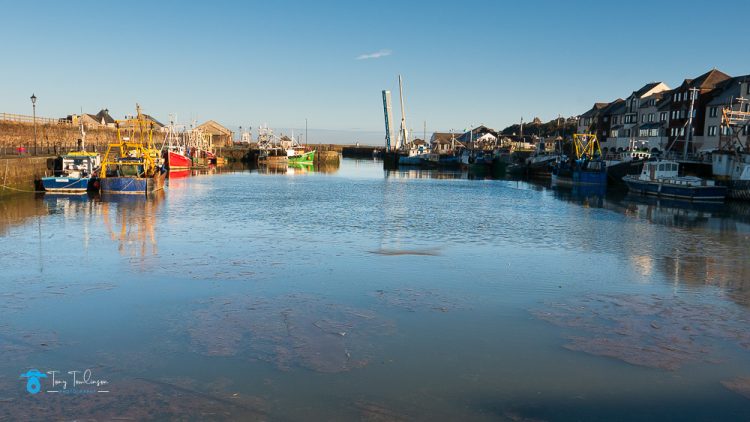
It was the harbour area that I was wandering around this evening which comprises of two docks, the Senhouse Dock and the Elizabeth Dock, a Children’s play area named “Shiver Me Timbers” an Aquarium, several cafés and a pub called the “Captain Nelson” locally known as the “Vatican”
There are many local art and craft, and local food events held on the land between the Elizabeth and Senhouse Docks throughout the year.
This area is also a very popular social area which leads to the town centre where there are numerous pubs, cafes and shops.
Elizabeth Dock
The Elizabeth Dock was built in 1857 with dock gates to contain the water of the high tide, so that ships continue to float without tide or waves bouncing them against each other, this being a “Floating Dock”. Today the Elizabeth dock forms the heart of Maryport’s working harbour.
Local fishing boats still land their catch on the Elizabeth dockside from where it can be purchased once the trawlers tie-up, this attracts a large crowd of people eager to purchase the fresh fish.
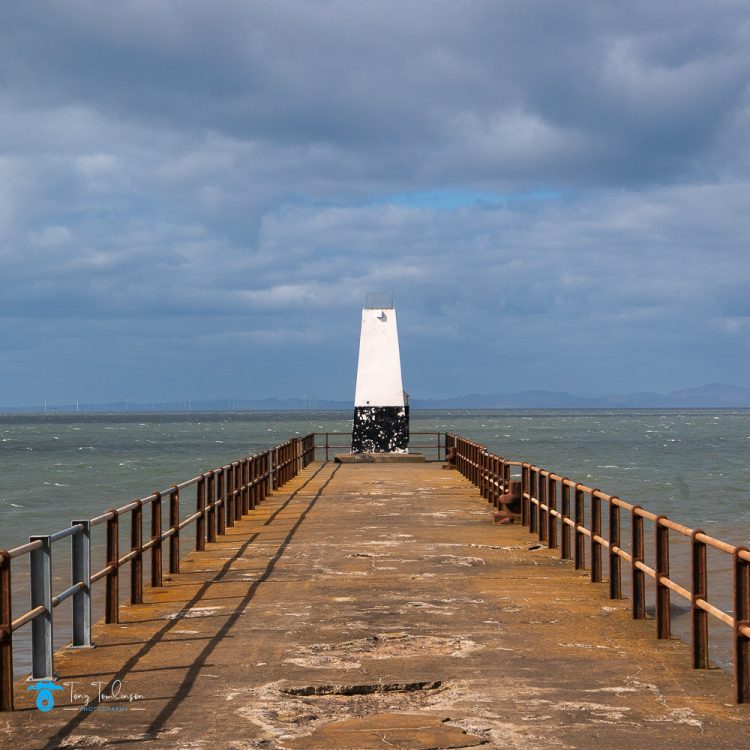
During low water the striking Ellenfoot pedestrian bridge is available to walk across, during high water the bridge is raised to allow the free passage of vessels.
Senhouse Dock
Increased harbour traffic soon required another dock, but the coastline had to be extended out to sea. Eventually in 1884 Senhouse Dock was built and opened with a great ceremony.
Senhouse dock of 1894, was transformed to a marina in 1990, and this is how it looks to this day.
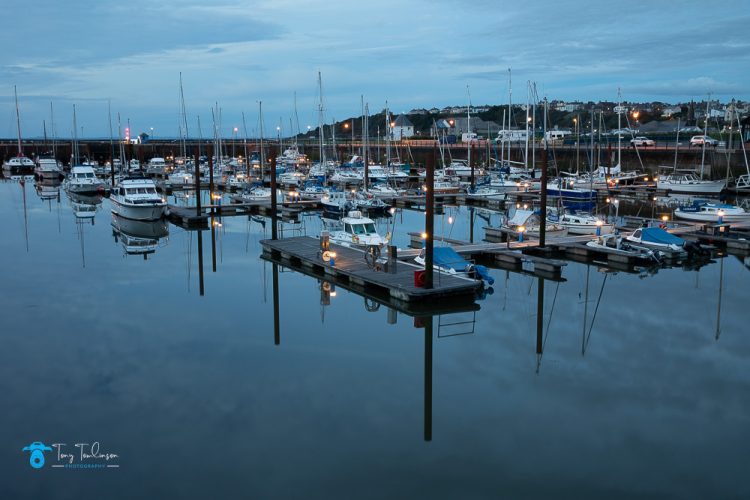
Further development alongside Senhouse Dock was the construction of a small but very popular caravan park with 28 Caravan pitches which have a electric hook up, and 3 camping pods, and an amenity block which has a pot washroom and individual toilet and showers, along with a disabled / family wet room.
There is also a motorhome grey water disposal point, along with an elsan point for chemical toilet waste. This site is operated by the Maryport Harbour & Marina Ltd
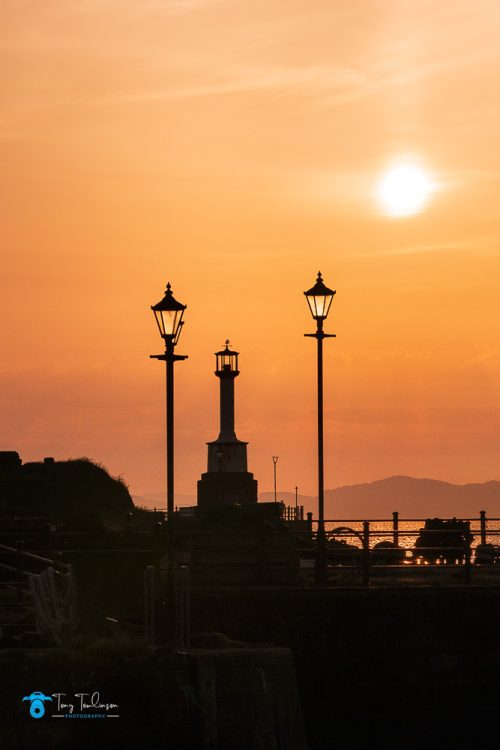
The Original Harbour Lighthouse
The town has a small lighthouse, formerly run by Trinity House, the general lighthouse authority for England. It is a Grade II listed building.
In 2010 Trinity House transferred responsibility for the new light to the Maryport Harbour Authority. The old lighthouse was restored and repainted in 2017 as part of a government-funded initiative for the refurbishment of seaside towns although the lighthouse is no longer in operation, a more modern harbour light has been placed further along the pier to aid boats entering the harbour.
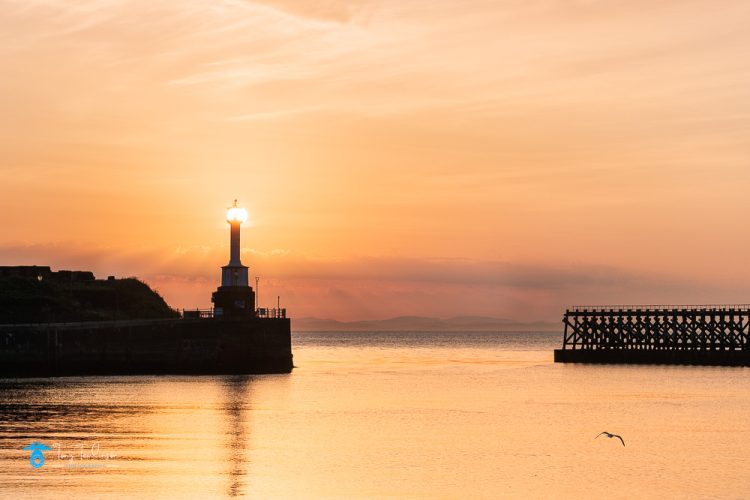
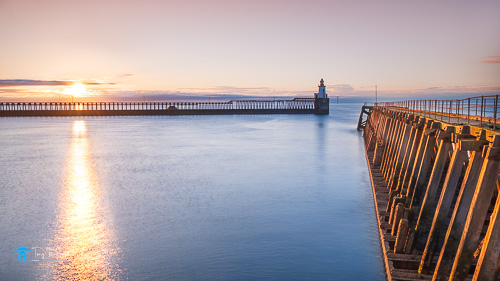
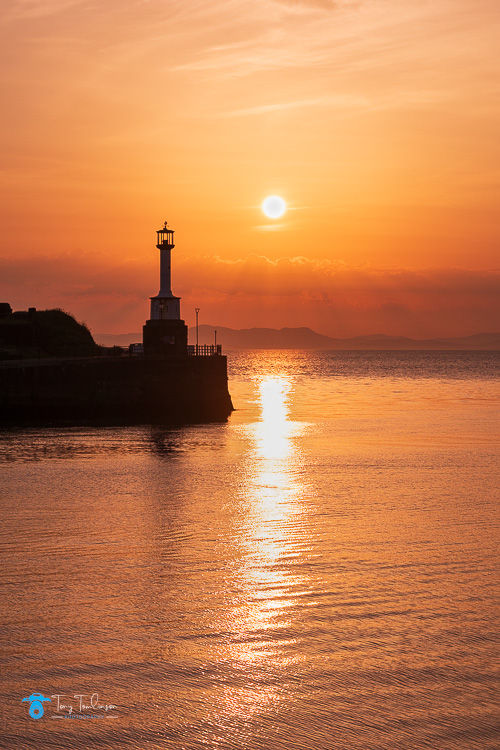
The new harbour light
In 1996 Trinity House provided a new aluminium tower for the end of the pier extension, lit by mains electricity. At 4.7 metres tall and with a light intensity of only 120 candelas, the new tower was one of Trinity House’s smaller beacons; it displays a flashing white light visible 6 nautical miles out to sea
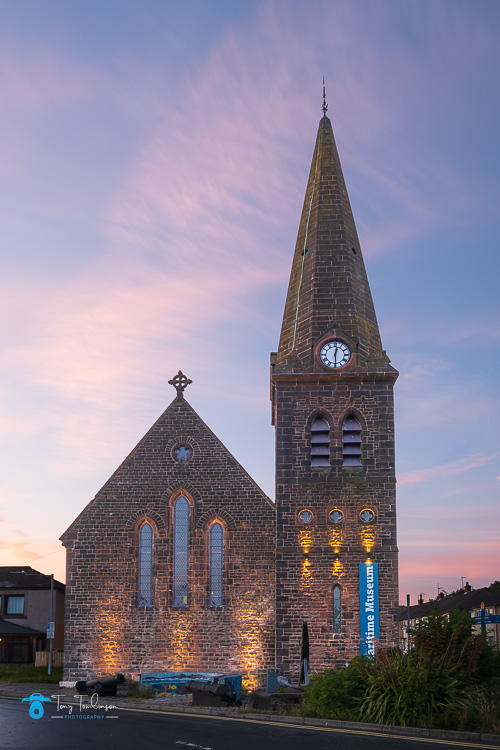
Christ Church
Christ Church on King Street, Maryport is an Anglican church, which was built in 1872 to designs of Charles Eaglesfield which is now a Grade II listed building and hosts the Maryport Maritime Museum.
The church dates back to 1872 and appears in artwork by the likes of LS Lowry and his protégé Sheila Fell.
The Church was opened on the December 12th, 1872. It had taken less than a year to build. Mr Marshall had been the contractor for the masonry, using stone which had come from the Netherhall quarry, joinery was by Mr Dent from Cockermouth, slating by Mandle of Maryport, glazing and plumbing by Piele from Workington and the plastering by Johnston of Carlisle.
The church clock is a flatbed clock with an anchor escapement and has the name “Wilson, Maryport” on the small dial on the clock itself. It is not known whether Wilson (a well-known local clock and watchmaker) actually made or merely supplied the clock. The bell was quite large and was not a traditional bell-metal bell, it was a steel bell made by the firm of Vickers in Sheffield. As was the practice at the time, the bell is in a frame and complete with wheel and stay for ringing, rather than just chiming.
Christ Church celebrated its Jubilee on Sunday 10th 1922, and a commemorative text recording the event hangs in the church.
In 2026 after a period of major repair and refurbishment works, the Church became the new home of the Maryport Maritime Museum.
The bridge across the River Ellen leads up to the town center where more cafes’ bars, and shops can be found.
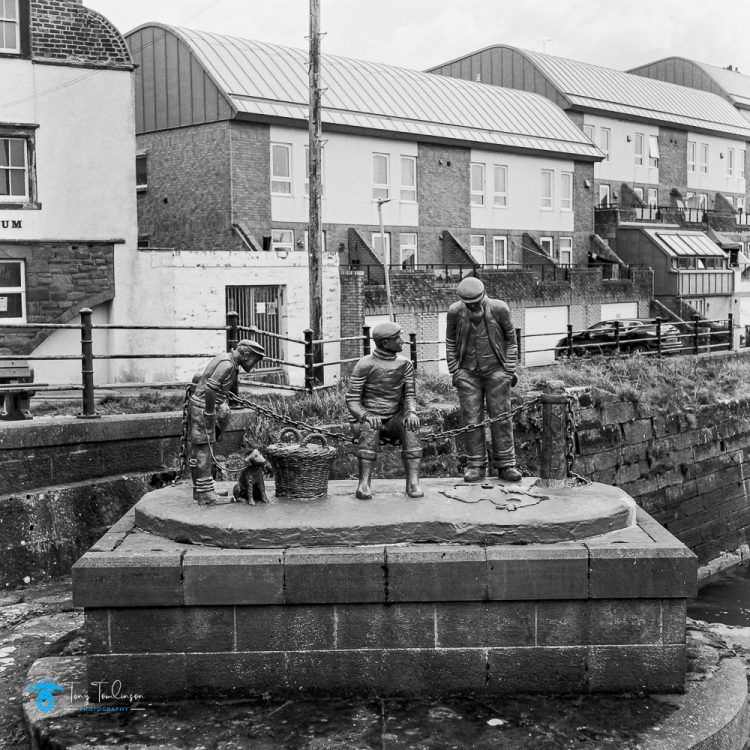
A Fishy Tale
As you cross the bridge there is an interesting sculpture on the right hand side, this is called “A Fishy Tale”, this was created by local artist Colin Telfer, the piece pays tribute to Maryport’s historic fishing community. Crafted using haematite iron ore, the artwork depicts traditional scenes of fishermen, complete with generations of local tradesmen, a fish basket.
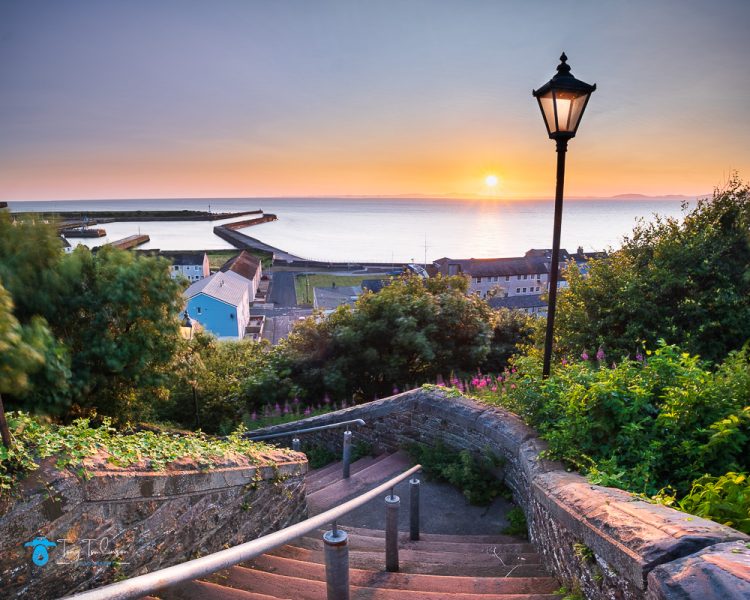
Back Brow Steps
There are two sets of very steep steps that lead up from the harbour level which reach to the old part of the town, these are known as the “Back Brow Steps” which have turned into a well used fitness circuit which are frequented by the various sport organisations in, and around the town.
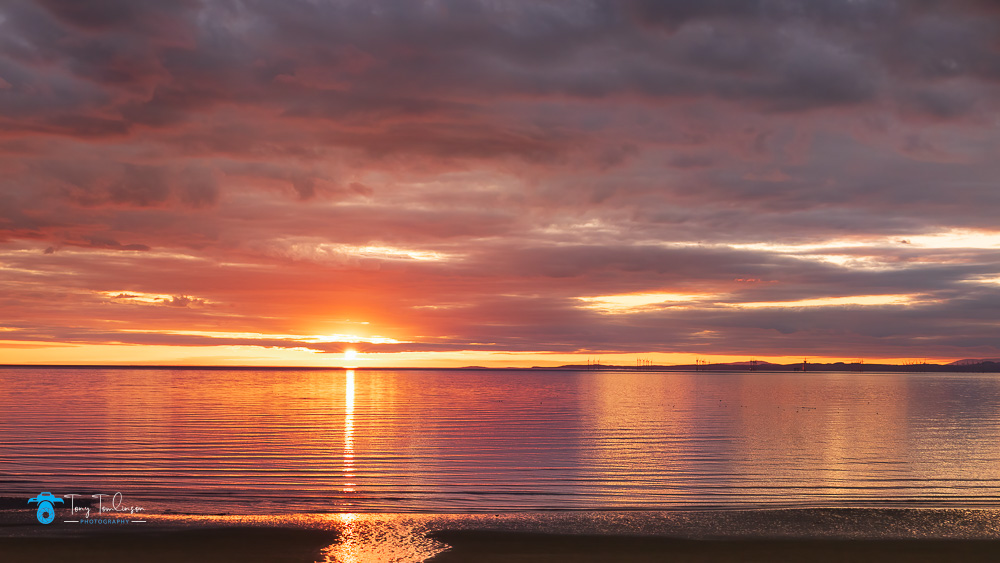
Summer Sunsets
During the summer months Maryport is a great place to view the stunning sunsets that appear across the Solway Firth looking towards Dumfries and Galloway in the South of Scotland.
This concludes my little history lesson of Maryport harbour and the immediate surrounding areas.
Thank you for finding the time to read this blog.
Until the next one, stay safe and well.